- Stock: In Stock
- Brand: PRO-TECH
- Model: KP332011
- Weight: 0.04kg
- Dimensions: 90.00mm x 18.00mm x 18.00mm
- SKU: KP332011
- UPC: 6009600403659
 Flute
Bit
 Carbide
Tipped
-
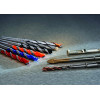
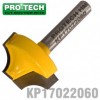
 Cut individual flutes-shallow, small-radius grooves-in narrow edges without having to balance a router on the edge.
- Cut flutes on the edges of curved pieces.
- The bit cuts at right angles to the bit axis
- Flute depth is controlled by the pilot bearing, the flute's position by the router's bit-height setting
- 2-Flute, industrial quality & carbide tipped
This router bit has a 6,35mm shank (shaft) that will fit most small or large routers. Please ensure that you select a router bit with a shank (shaft) size that will fit into your router collet.
PRO-TECH router bits are manufactured in Taiwan.
Router Bit Maintenance
Fortunately, this is pretty easy. The best way to prolong the life of a router bit is to keep it clean. And what you need to do varies with the type of bit.
Note: Sharpening is extremely important too.
A. No Bearings:
To clean bits without bearings, first blow off any dust. Then remove any resin that has built up. (Resin places a drag on the bit which can cause it to overheat and burn.)
Resin removers are available. It's the same stuff you use to clean your saw blades.
B. Bits with Bearings:
To clean bits with bearings, first, remove the bearing. Then clean the bit as you did with non-bearing bits.
It's important to remove the bearings because even though router bearings are 'sealed,' resin remover can sneak in and dissolve the bearing grease. If this were to happen, you would be faced with the problem of trying to lubricate a sealed bearing.
Despite the claims of bearing grease sellers, we've never had much luck with this. Once that grease is gone, just go buy a new bearing.
C. Bit Shanks:
Periodically inspect the shanks of your router bits for rust or burrs. Either of these can be removed quickly with ScotchBrite®. Left on, they can interfere with your ability to properly tighten the bit in the collet.
How Fast Should a Router be Running?
If you've got a router with variable speed, then you've got the power to improve the quality of your cut. In general, the larger the bit, the slower the speed you need. The perfect solution for dealing with varying bit sizes is a variable speed router.
Here are general guidelines for most bits:
Hand Held Router Use
| Bit size | Bit size | rpm |
| Small – 12.7 mm | 1/16' to 1/2' | 22,000+ |
| 12,7 mm – 28,6 mm | 1/2 to 1 1/8' | 14,000 - 18,000 |
| 28.6 mm – 50,8 mm | 1 1/8' to 2' | 12,000 - 14,000 |
Router Table Use
| Bit size | Bit size | rpm |
| 50,8 mm – 63,5 mm | 2' to 2 1/2' | 12,000 - 14,000 |
| 63,5 mm & larger | 2 1/2' and up | 8,000 - 12,000 |

| consider safety for your health and the people around you | |||
General safety suggestions:It is advisable to always have the following items nearby and in a good condition
|
|||
|
|
|
|
|
|
Wear Gloves
|
Eye Protection
|
Hearing Protection
|
Dust Mask
|
Router Table Safety
Although most router bits are small, they can be potentially dangerous and should deserve your attention and respect.
 1
Use push sticks or a push block to position your hands a safe distance from the
router bit.
2 Use large-diameter bits only in a router table. Using bits over 25mm Ø (diameter) in a handheld router can possibly cause you to lose control of the tool and harm yourself or bystanders.
3 Always wear a dust mask as well as eye and hearing protection.
4 Take light cuts. Heavy cuts invite kickback. If necessary, move the fence closer to the bit or switch to a larger guide bearing/bush.
5 Use a featherboard (anti-kickback device) to support the workpiece against the router table and/or fence.
 6
Never climb-cut. Always feed the stock from right to left. Against the rotation
of the router bit. (see illustration)
7 Avoid routing small stock. Instead, rout a larger piece and cut it to size afterwards. If you absolutely have to profile a small piece, build an suitable jig or secure the workpiece.
8 Always use a guard. If the fence didn’t come with a guard, make your own.
9 Never start the router with the bit in contact with the material.
10 Don’t force the router bit or overload the router. Excessive heat is an enemy.
11 Secure/fasten the router in the base before starting/switch on the router.
 12
Don’t bottom out the bit in the collet or partially insert the bit. Instead, completely
insert the bit, and then back off approximately 2 mm. At least 2/3
's of the router bit shank should be inside the collet.
13 Be sober and not under the influence of medicine that causes a lack of concentration
14 Tidy up your workshop to ensure the ability to move freely with enough room around the router table
| Part No. | Shank dia. | Cutting width | Cutting Height | Radius (r) |
| KP332011 | 1/4 inch | 7/8 inch | 1/4 inch | 1/8 inch |
| 6,35 mm | 22,2 mm | 6,35 mm | 3,2 mm |
Length of Shank: 32 mm
Replacement bearing: KP100 5-8

![]()
![]()

